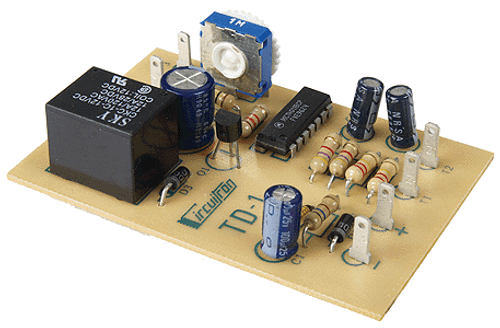
Circuitron AW-1 Arc Welder Circuit ~ 5841
The CIRCUITRON AW-1 and AW-2 Arc Welder Circuits use a blue and yellow lamp
along with a sophisticated random flicker circuit to produce a very convincing simulation of an arc welder in
operation. In both circuits, the yellow lamp provides a continuous flicker effect and the blue lamp pulses random
bright blue flashes. The AW-1 utilizes high output 1.4 mm micro-lamps and is designed for direct viewing in a
situation where the modeling scene will depict an actual welder at work. The AW-2 uses larger 3 mm lamps and the
brighter output is ideal for backlighting a structure window to simulate welding inside a building. The yellow lamp
may be used alone on either the AW-1 or AW-2 to provide a simple flickering flame effect. These circuits require a
10 - 18 volt AC or DC input for proper operation.
INSTRUCTIONS: The AW-1 / AW-2 can be connected with .110" solderless connectors or by soldering leads directly
to the terminals on the printed circuit board. If soldering, use a small pencil-type iron and electronics-grade rosin
core 60/40 solder (available at Radio Shack). Use only as much heat as necessary to obtain a good joint and do not
wiggle the terminal until the solder has cooled completely.
LAMP LOCATION
AW-1: The Micro-Lamps are to be mounted into the model or scene in direct view of the observer. We
recommend placing the yellow lamp in the foreground with the blue lamp mounted slightly to the side behind
it. In this way, the random flickering of the yellow lamp predominates, and the bright flashes of blue will be
seen right beside the yellow. A small wisp of cotton may be placed over the lamps to simulate smoke.
AW-2: The 3 mm lamps should be located inside the structure, side by side. The windows of the structure
should be diffused by spraying with Dullcote™ or by sanding with 600 grit paper. Distance from the windows
will vary depending on the effect desired. We recommend experimenting before fixing the lamps in position.
Placing a shiny foil reflector behind the lamps will help to concentrate the lights on the windows.
NOTE: Although the lamps provided with the AW-1 / AW-2 should last a long time, we recommend allowing for
the eventual failure or burnout of the lamps. DO NOT seal the lamps into a closed model that might have to be
destroyed in order to replace them.
CIRCUIT BOARD WIRING
1) Mount the AW-1 / AW-2 in a convenient location near the lamps. In the case of the AW-2, it may be possible to
mount the circuit board inside the structure. You may drill holes in the 4 corner mounting pads or use a
section of CIRCUITRON's PCMT for simple snap-in mounting.
2) Connect one lead from each lamp to the COMMON terminal on the AW-1 / AW-2 circuit board.
3) Connect the remaining lead from the YELLOW lamp to the terminal labeled on the circuit board.
4) Connect the remaining lead from the BLUE lamp to the terminal labeled on the circuit board.
5) Adjust the trimmer labeled P1 fully clockwise, then counterclockwise 1/4 turn.
6) Connect a 10 - 18 volt AC or DC power source to the and input terminals. If DC is used, be sure to
observe proper polarity. Both lamps should start flashing immediately.
NOTE: When powering the AW-x circuits off AC, component tolerances may cause the lamps to light dimly or not at
all. This is not usually a problem with higher voltages (16-18 VAC). The solution is to use a DC power source, or to
connect a 100 microfarad, 25 volt capacitor (supplied) with the + end connected to the banded end of diode D1 and
the side of the capacitor to the terminal. See FIGURE 3.
ADJUSTMENTS AND OPTIONS
1) By adjusting trimmer P1 counterclockwise, the frequency of BLUE flashes is decreased. At some point,
depending on lamp type, the blue lamp will stop flashing altogether. Adjust P1 to your liking.
2) The YELLOW and BLUE lamp connections may be interchanged if you prefer a BLUE flicker with YELLOW flashes.
Other size or color lamps may be substituted. Lamp ratings should be:
AW-1 -- 1.5 volts at 60 ma. maximum.
AW-2 -- 5.0 - 6.0 volts at 250 ma. maximum.
3) By design, the YELLOW lamp goes completely OFF during a certain percentage of the flicker cycle. If you prefer
to have a slight glow at all times, wire a 2 watt resistor from the banded end (cathode) of diode D1 to the
terminal. The value of the resistor will vary depending on your supply voltage and how bright you want the
lamp lit. Start with a value 20% higher than shown in the graph on the next page. You must measure your
input voltage carefully with a voltmeter at the cathode (banded) end of D1. DO NOT trust your power pack
rating. Then work down. Lower values give a brighter light. WARNING: Too low a value will burn out your
lamp instantly. Be Careful!


